
Recently Bob Yule of Autofarm Ltd was kind enough to allow me to take a close look at a very early 1954 Austin Healey 100, with only 5300 miles on it from new, that he had in his shop for service.
One does not often get the chance to examine such an original car close up so I am very grateful to Bob, Tom and the owner of the car for this opportunity.
Having just completed the restoration of my own BN1 I had a number of details that I was very keen to check and during the course of the inspection I photographed several interesting and little known details about these early cars.
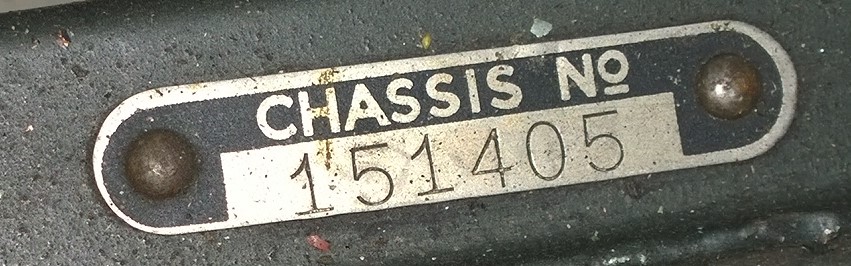
The car in question is C. BN1L 151405 body number 1267 and the engine number is 1B205529.

The car’s original paint is a very unusual “Gunmetal Grey” colour. Records have been found for around 6 cars painted this colour at around the same time so it is thought that this was a “trial balloon” to see if it was a seller.
The interior is bright red (persimmon), which is also original.
Although the car is in outstanding condition for a 60 year old vehicle a couple of small “additions” have been made to the electrical system and unfortunately the engine and gearbox have at some stage been out and reputedly rebuilt. Whoever did the engine rebuild did a good job but some details of the re-installation have been done a little carelessly meaning that those areas affected by this work are somewhat suspect insofar as originality is concerned.
The following are some very interesting details that I noted on the car which were previously unknown to me although I’m sure some at least are well known to others.
Generator terminal phenolic separator plate.
 I suspect that the paint was applied after the engine rebuild. I believe that this was an original, but often discarded part, as it can be seen in the in Fig.8 on page O/7 of the factory workshop manual.
Small tag on wiring harness.

Handbrake lever finish.


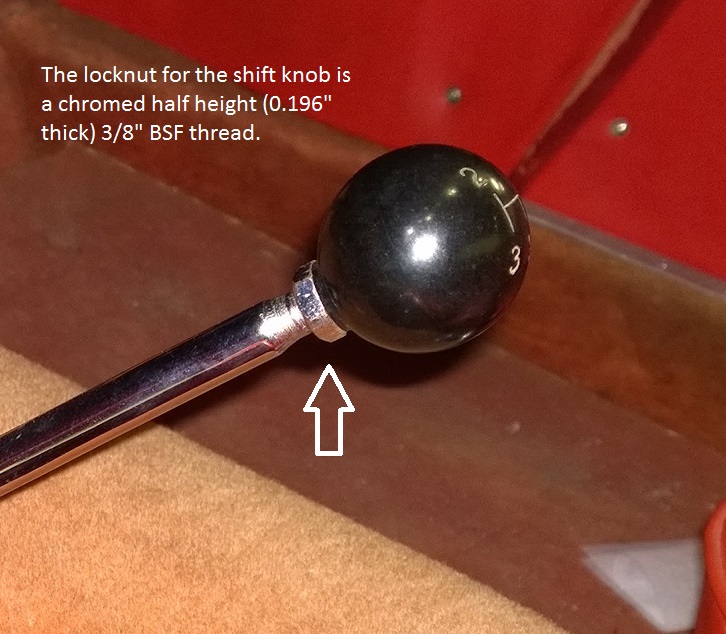
Shift knob lock nut.
The vent duct material.
 Most restorers use “Kopex” tubing in this location but that is definitely not what was used originally. I think it may also have been used in early Sprites. If anyone can tell me where to get some of this I would be very grateful.
Horn rim securing screws.
 I had always thought that these screws were painted with the horn but on these horns they most definitely were not. What is strange is that overspray of the horn paint is often seen on the black spring disc under the sounding disc..
Low tension connection at distributor.
 Of note here is the unpainted engine number plate. I suspect that this is one of the things done incorrectly during the engine rebuild. It is pretty well confirmed that these were painted engine colour.
I should also mention that the rubber sleeve was used on most connectors on these early cars other than grounding points.
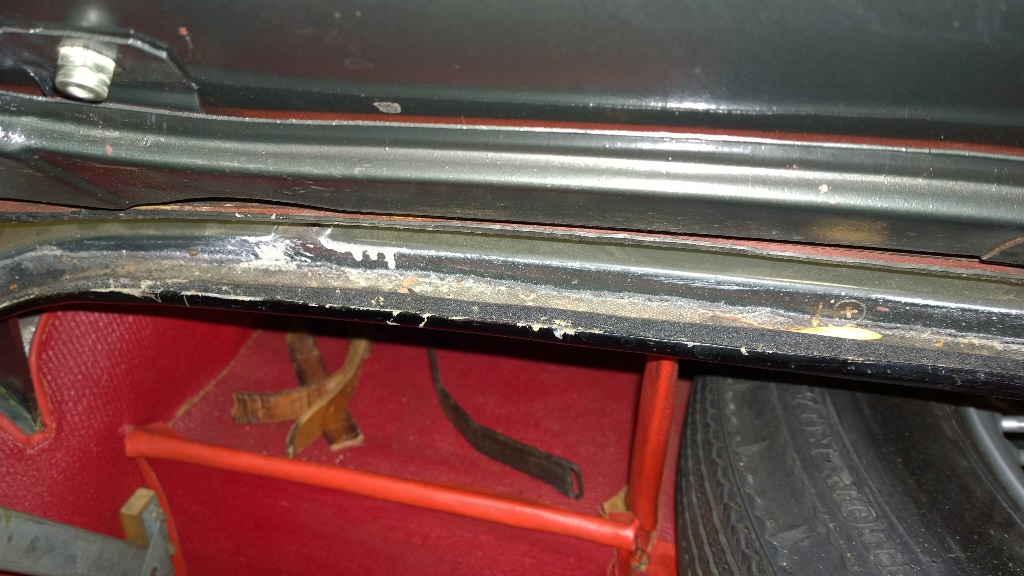
Notch in bottom on RH inner sill. (this one really surprised me)
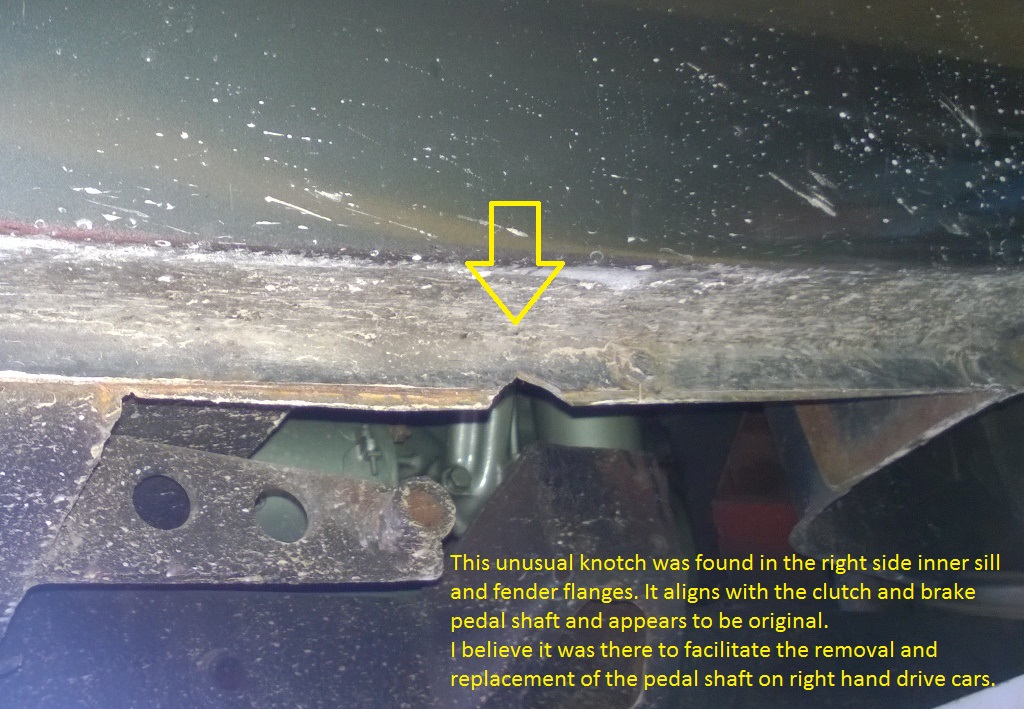 On the right side there is less than 4″ between the inner sill and the pedal shaft support bracket. On the left side there is 7″. There was no sign of this notch on body #174.
My guess is that someone didn’t check the build sheet and installed the pedal shaft on the wrong side on this car and, after the engine was installed, the only way to get it out and move it to the correct side was to cut this notch in the sill.
The bonnet latch parts appear to have been plated.

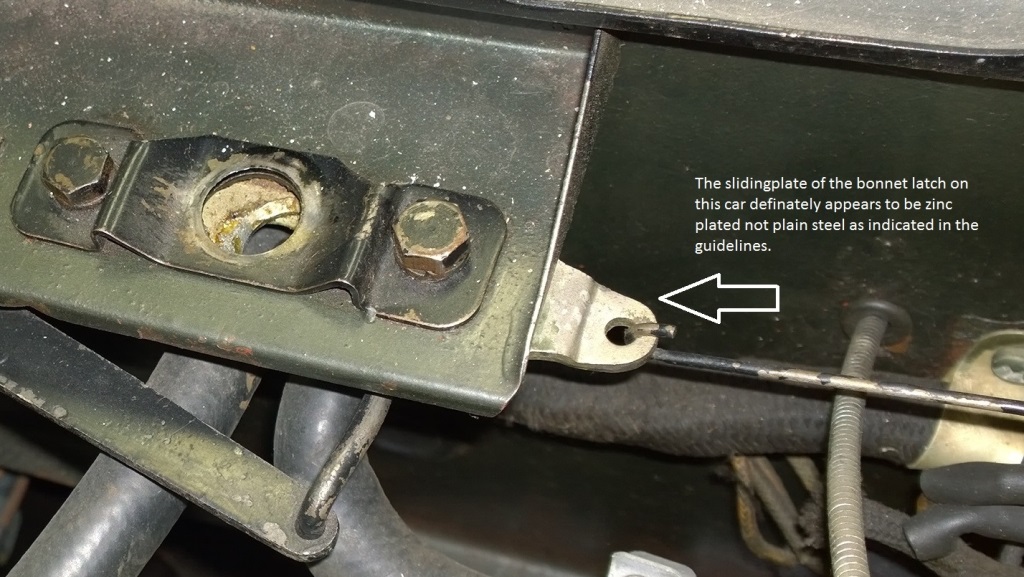 I have pointed these finishes out because there are errors on this point in the 2015 Concours Guidelines
Fuel line in trunk painted black.

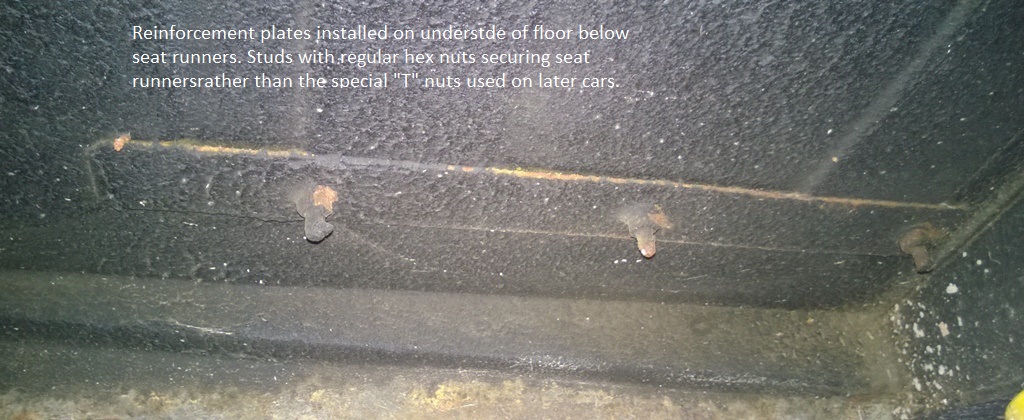
Seat runner reinforcement plates under floor.
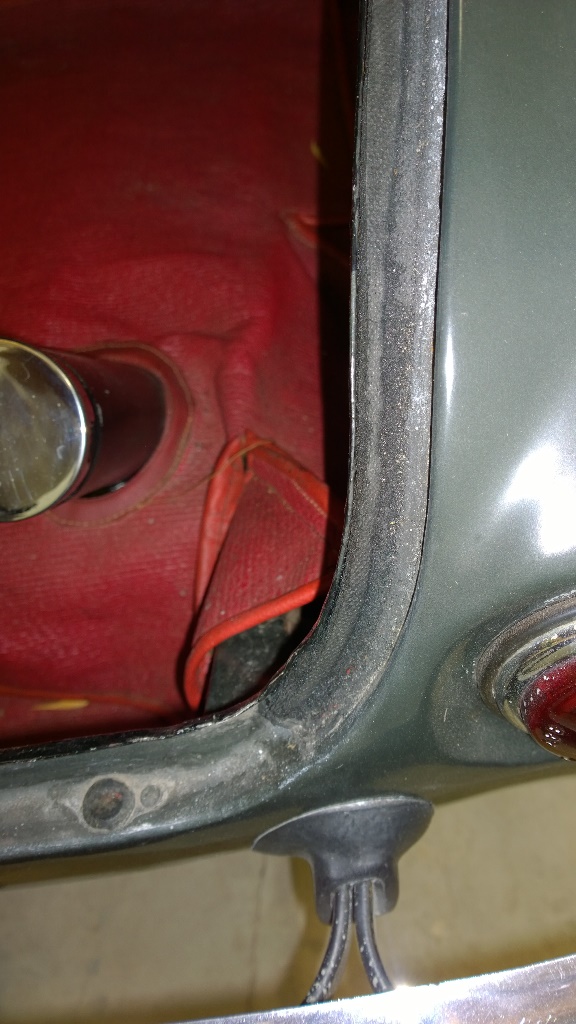
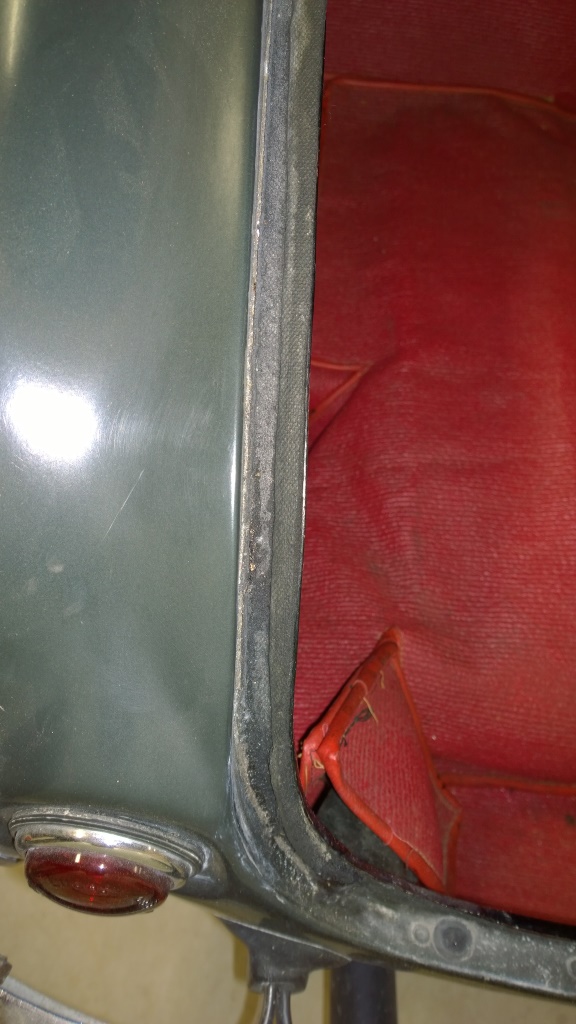
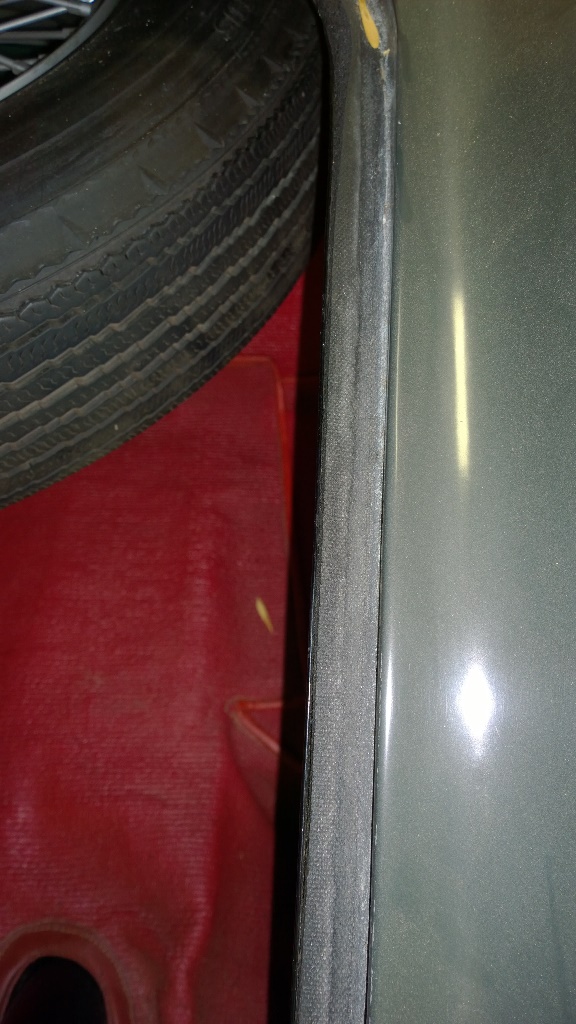
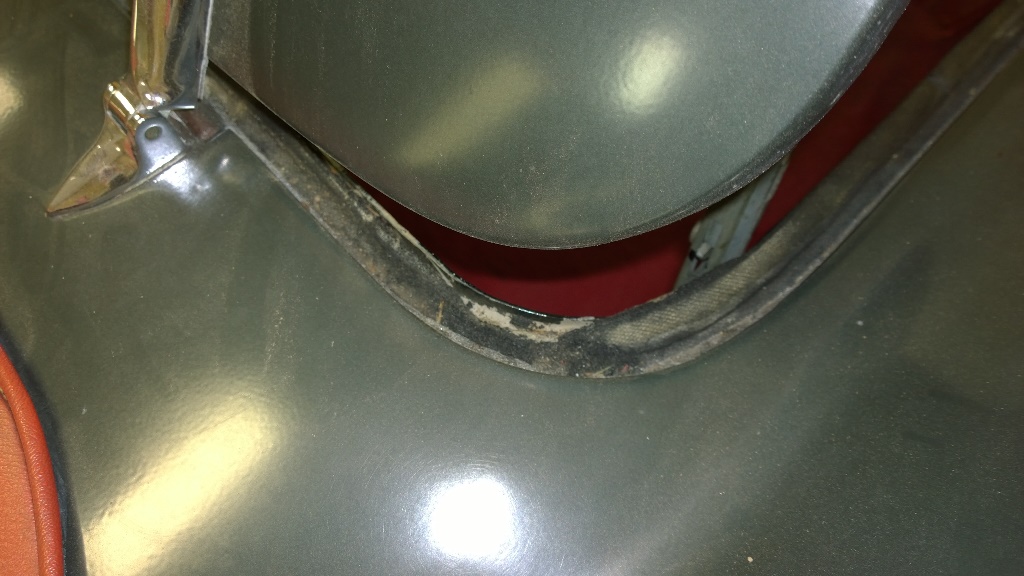
Tonneau cover and windshield spring parking posts on scuttle.

 I believe that the windshield springs are meant to be “parked” on the inner post. There was no reason to believe that these posts had ever been changed so I have no idea why they are different side to side. On later cars a “Lift The Dot” post was used for the springs but on earlier cars all 4 were Tenax posts.
Bumper splash pan securing screws.
 By installing these 10/32 screws with the nut forward only the head was visible inside the fender which looked tidier. This is common to all 100s other than on very early BN1’s where self tapping screws were used here again with the head visible inside the fender.
Harness clip secures cables at gearbox cover adaptor plate. Again common to all 100s and sometimes hand painted black.
Poor panel alignment.
 The panel alignment is really quite poorly done with the crease line on the drivers door being almost 1/4″ above that of the fender.
Boot lid seal is installed in the shroud gutter not on the lid.

 This is something that I have been pretty sure of for some time so it is nice to have it confirmed. With the aluminium boot lid it would have been very difficult to install the seal on the lid because of various obstructions. The seal itself appears to be very similar in section to that used on the steel lids but it has a strange “mesh” surface texture.
The parts book refers to this seal being 4 pieces but on this car it was definitely a single piece of foam rubber.
There are several other interesting details on this car that were new to me so more later.
Hello,
It is August 2020 and my car 150952 is ending its restauration. What a job, but so rewarding.
I restored with the known books in hand but regularly looked at Michael’s site and others, because often pictures say it better than a description.
Now trying to manage details as the boot seal, for “seal on the car” , but that will be found somewhere I am sure.
It lacks the upholstery and the hood ( soft top). That’s the next job.
The car is back to its original black and off white, difficult colour black, to get panels straight, well…..
A BIG thank you to Michael for all the info on his site.
Hope to register the car end of September and enjoy it in Automn.
I have body number 544, chassis number BN1L147312, built in ’53 but it was pretty far gone when I started it so some of the pointers you have noted had rotted away (like the notch on sills / rockers). However, I can corroborate: the zinc plated part of the bonnet (hood) release; the plated hood striker; the painted (or satin chrome) handbrake lever shaft below the handle bit and the half-nut under the gearknob. On the other hand, I have lift-the dots for parking the windscreen spring but tenax studs next to them for the tonneau, so one of each on both sides. My seats were bolted to (roughly 1″ by 2″) captive plates that themselves are bolted to the floor at each end with a threaded hole in the centre for the seat bolt. There is one for each bolt, so four per seat. My dashboard is in two pieces, the bit for the dials which is pressed in later cars is separate with a rubber seal between it and the main dash.
My car came from Massachussetts apparently so was a NA car, though it’s now in the UK.
Very interesting article. It must have been fascinating to see such an original car up close, lucky chap.
Hello,
I start the restoration of a Januari 1954 BN1 , BN1L 150952, so close to the one you describe. Mine has alot of “things ” in boxes , and a lot?? missing of the smaller bits and pieces. So these pictures were great, as are the other comments I already read on the blog. I will be a regular visitor in the next few years, I hope.
My car has matching numbers and although now gream, it was originally black with off white interior.
Also read the item on bleeding the brakes. Great info. Thanks;Kind regards,
Jacques
It is interesting to see Jaques message, I purchased a BN1L January 1954 from New Jersey many years ago and still have it( I will check the chassis number), it is also black with off white interior although it too went to green and then white.
It has aluminium bonnet and boot.
The records state that it was special order for export.
Glad to find this article lots of good information.
Shaun
I just purchased an early 100 that had no boot seal installed, and was only a day away from trying to install the seal on my alloy lid! Looking at it, I thought there’s no way… I’m so grateful to have come across this site, as I had read several cautions that the seal goes on the lid instead of the body. From the photos it looks like the seal ends before going across the bottom lip. Do you think a piece is just missing, and should go all the way, or is it stopped at the corners intentionally?
My car is 151741 built 2/54, so it is close to this one. It’s black, but has the brighter red seats like this one. I would love to see any further detail photos or info you have from this car. Interesting the engine needed to be rebuilt with 5,300 miles?
Dave
those are great photos, thanks for sharing