
The Austin Healey 4- and 6-cylinder factory workshop manuals recommend that in the absence of Service Tool 18G37 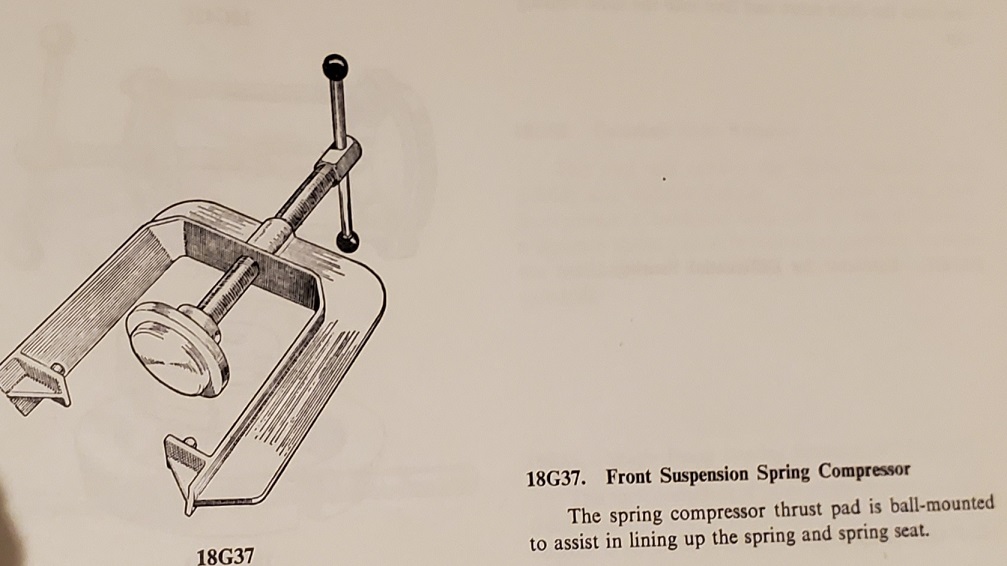
the compression of the coil spring can be released using two 3/8″ B.S.F. slave bolts of high-tensile steel, 4 in long and threaded their entire length. You can be assured that such bolts are not available anywhere in fact the same thing in the more common 3/8” U.N.F thread is also virtually impossible to find so, like most people, I have for over 40 years resorted to using 3/8” U.N.C. threaded rod.
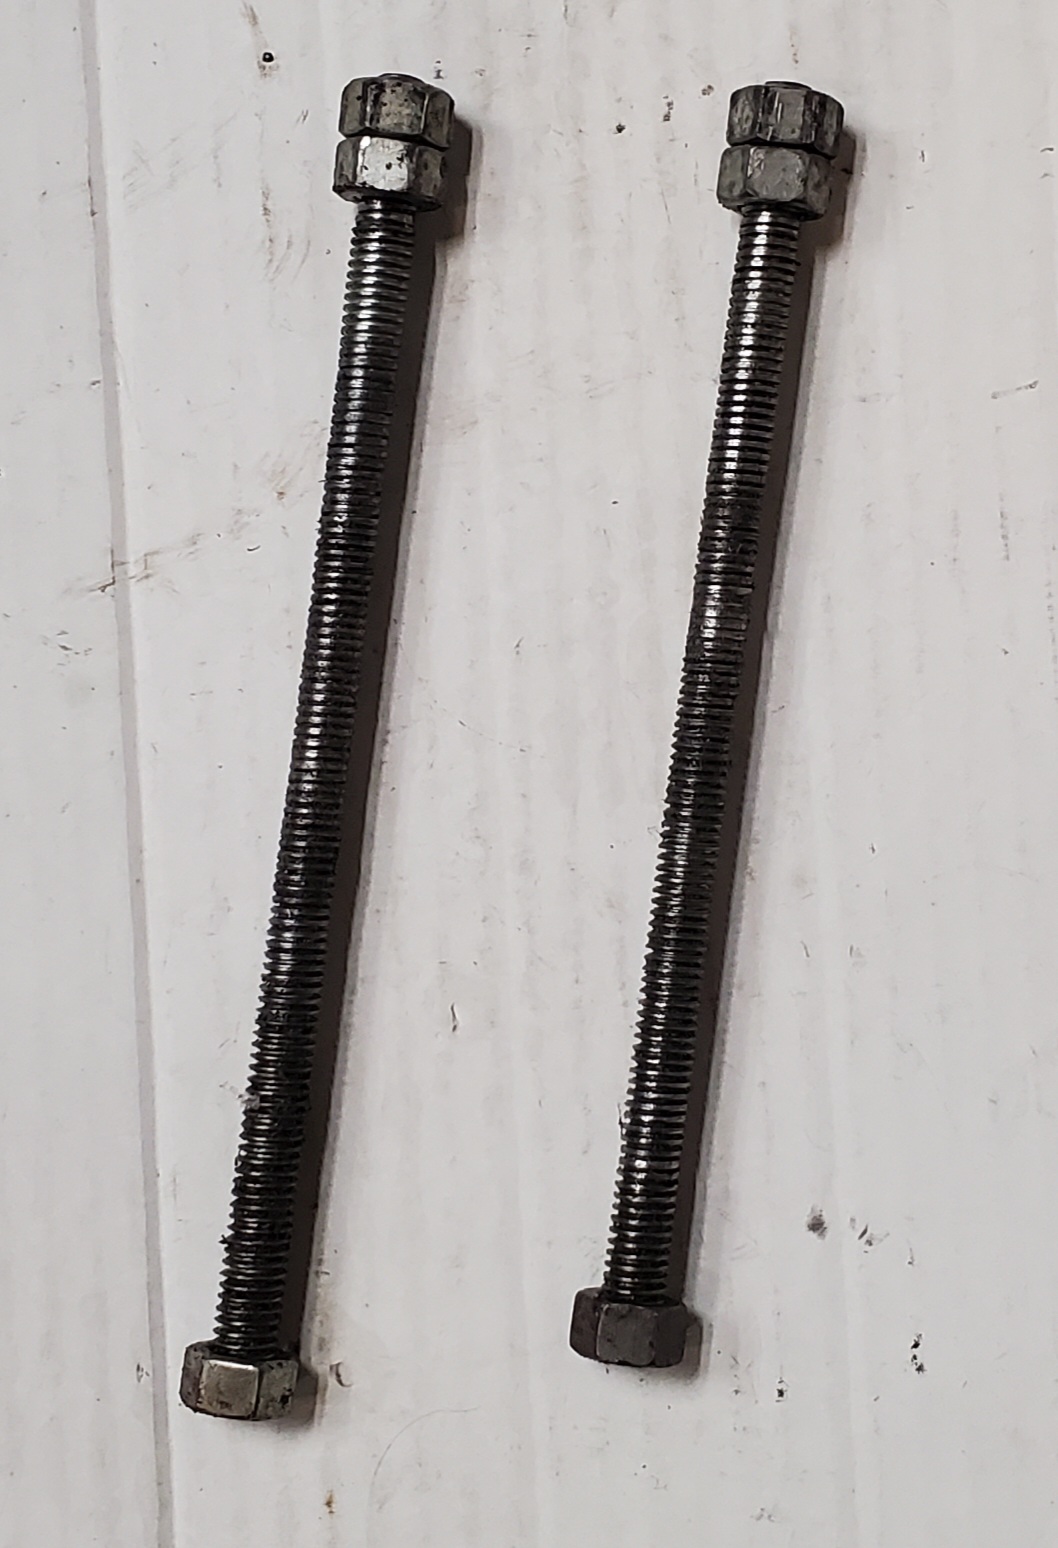 The problem is that this type of rod is not made of high tensile steel and is really not up to the task. There is a lot of energy stored in a suspension spring and when those U.N.C nuts strip or one of the rods breaks the results can be “interesting”.
The last time I did this job a threaded rods broke after one of the nuts seized and I can assure you that I was very lucky to survive with only a bruise or two and a significant dent in the front shroud of the car I was working on after the spring bounced off it. Those things really fly!!
After that experience I decided that I would look into building a special tool for the job as the special tool 18G37 is, of course, no longer available.
As we are located in a somewhat remote area getting any materials that I don’t have on hand involves a return journey of at least a 1 hour so I did my best to make do with what I had to hand.
This is a list of the materials used:
8 inches of 1” x 1” mild steel square bar. This was cut from a survey marker that had to be removed when we built our house 12 years ago because it overlaps a survey line.
2 x 7-inch-long sections of ¾” x ¼” galvanized rectangular bar. This had been used by the former owner of our property to support large wire mesh enclosures around cedar tree plantings to prevent deer from eating them (it didn’t work).
9 inches of 5/8” U.N.C. threaded rod and a 5/8” U.N.C square nut which were left over from some that my BIL, who lives 2 doors away, used for holding his dock cribs together.
A timing belt idler pulley from my son’s Mitsubishi 3000 GT VR4 which was changed as part of a timing belt service
After a lot of tweaking and twisting, drilling and tapping, turning and welding this is what I came up with.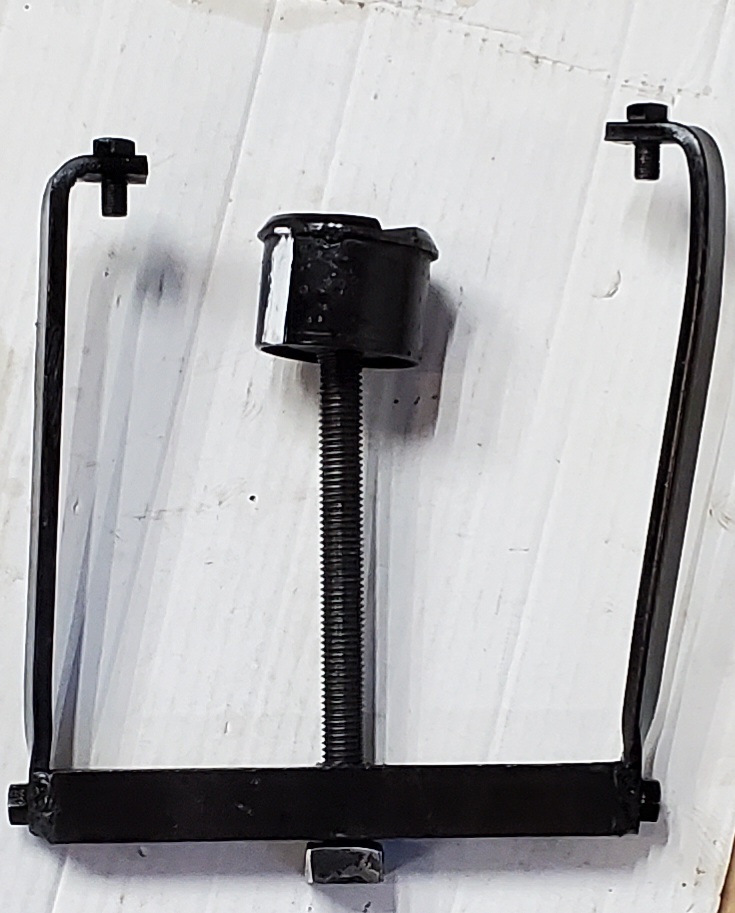
Fortunately, I have a lathe, a good selection of drills and threading taps, a TIG welder and, being retired, lots of time.
It turns out that the required geometry of this tool is not quite as simple as it at first appears because the center-line of the spring is not located at the center point of the spring plate which results in a significantly offset load.
The first time that I put it to use I was extremely cautious and wrapped a shipping blanket around the suspension to absorb any flying springs or hardware but, fortunately, it worked “gloriously” as my granddaughter would say.
So if you have nothing else to do for a day give it a go but keep your head down during the test run.
Michael,
I am making this. I have all the materials now. On the straps, how far is the small bolt from the 90 degree bend and what size bolt did you use that was adequate to locate the strap on the A arm?
Ken Freese
Hi Ken, I don’t have the tool with me at the moment but I can probably answer your questions adequately.
The small bolts are 3/8″ UNF. I made them about 1.25″ long so that they engage adequately in the holes in the “A” arms. The centers for the holes that I tapped into the straps were around 3/4″ from the inside of the bend.
For the tool to work on both sides I found that a little more clearance was required there.
I will be back at my shop after Xmas and can give you more accurate information then.
Best to you and yours for Xmas. Michael S
Great to hear from you John. Yes I do have to admit that the CET training that I got in the RNZAF has been a fantastic asset. Pity they couldn’t have made the long term career prospects more attractive.
I always string a length of chain (like a tow chain) inside the spring top-to-bottom and anchor it to the suspension before compressing the spring. That should constrain the spring from flying off if the spring compressor should break.
Go up to 1/2 threaded rod for extra strength.
Unfortunately Ed the holes in the suspension arms are only 3/8″ diameter which limits the diameter of rod that can be used.
Happy New Year ,Michael . Good to see that all that expensive aeronautical training is coming in handy !!!
Great to hear from you John. Yes I do have to admit that the CET training that I got in the RNZAF has been a fantastic asset. Pity they couldn’t have made the long term career prospects more attractive.
Happy New Year Michael. Helpful as always. Much appreciated.
Michael,
I’ve always used the “hardware store” quality all-thread and didn’t think twice about it. Probably should. I have only done the job a few times and haven’t had any problems. I do think that the four inch length is a bit short. McMaster-Carr has SAE Grade 8 3/8″-24 all thread. A foot long piece is $14 (https://www.mcmaster.com/3313N27/). Carroll Smith would probably prefer to use AN fasteners instead of Grade 8 (too brittle), if that exists. 🙂
Cheers,
Bob