
The Smiths heater used in the Austin Healey 100 is controlled by a valve mounted on the engine cylinder head. There were 3 versions of this valve but all have an inherent weakness in that the stem is easily broken just below the handle when too much “enthusiasm” is used to shut off the valve.
 The handle is secured to a squared section of the stem of the valve with a very fine thread brass nut.
As is to be expected spare parts for these 60 year old valves are not available, in fact original valves are difficult to find at all however all is not lost as the stem can be repaired.
 Making an entire replacement stem, which has a “floating cap” on the end, would require a lot of machining.
This is the process that I use for the repair however ,be advised, that this involves a lathe and some machining skills.
I start by facing off the broken end of the stem and drilling out to 11/64″ to a depth of 0.4″.
 Because the jaws of my lathe are too deep to hold the stem such that the end protrudes to permit facing off I have made a special collet to hold the stem in the chuck.
 The next step is to make a steel insert to fit into the hole drilled in the stem. This has a 11/64″ diameter stem on one end which is 0.4″ long stepping up to a 17/64″ diameter section 0.200″ long and then down to 3/16″ diameter 0.250 inches long.
 I have been unable to identify the original thread used for the nut on these stems, let alone purchase a die to cut it so I cut a 10/32 thread on the insert. I then hand file the 17/64′ diameter section down to a square to fit into the original handle. (NOTE … Thanks to Bob Haskell who has identified the thread 3/16″ x 40 T.P.I. is a Model Engineers thread.)
 After ensuring that the 11/64″ section of the insert will fit neatly into the drilled out stem
 I then carefully “tin” both the insert and the drilled hole in the stem and solder the insert into the stem. (Sorry about the focus on this pic)
 The finished repair of the stem looks like this.
 and the handle can then be secured with a brass 10/32″ nut.
 In reassembling the valve I use greased hemp to replace the original packing
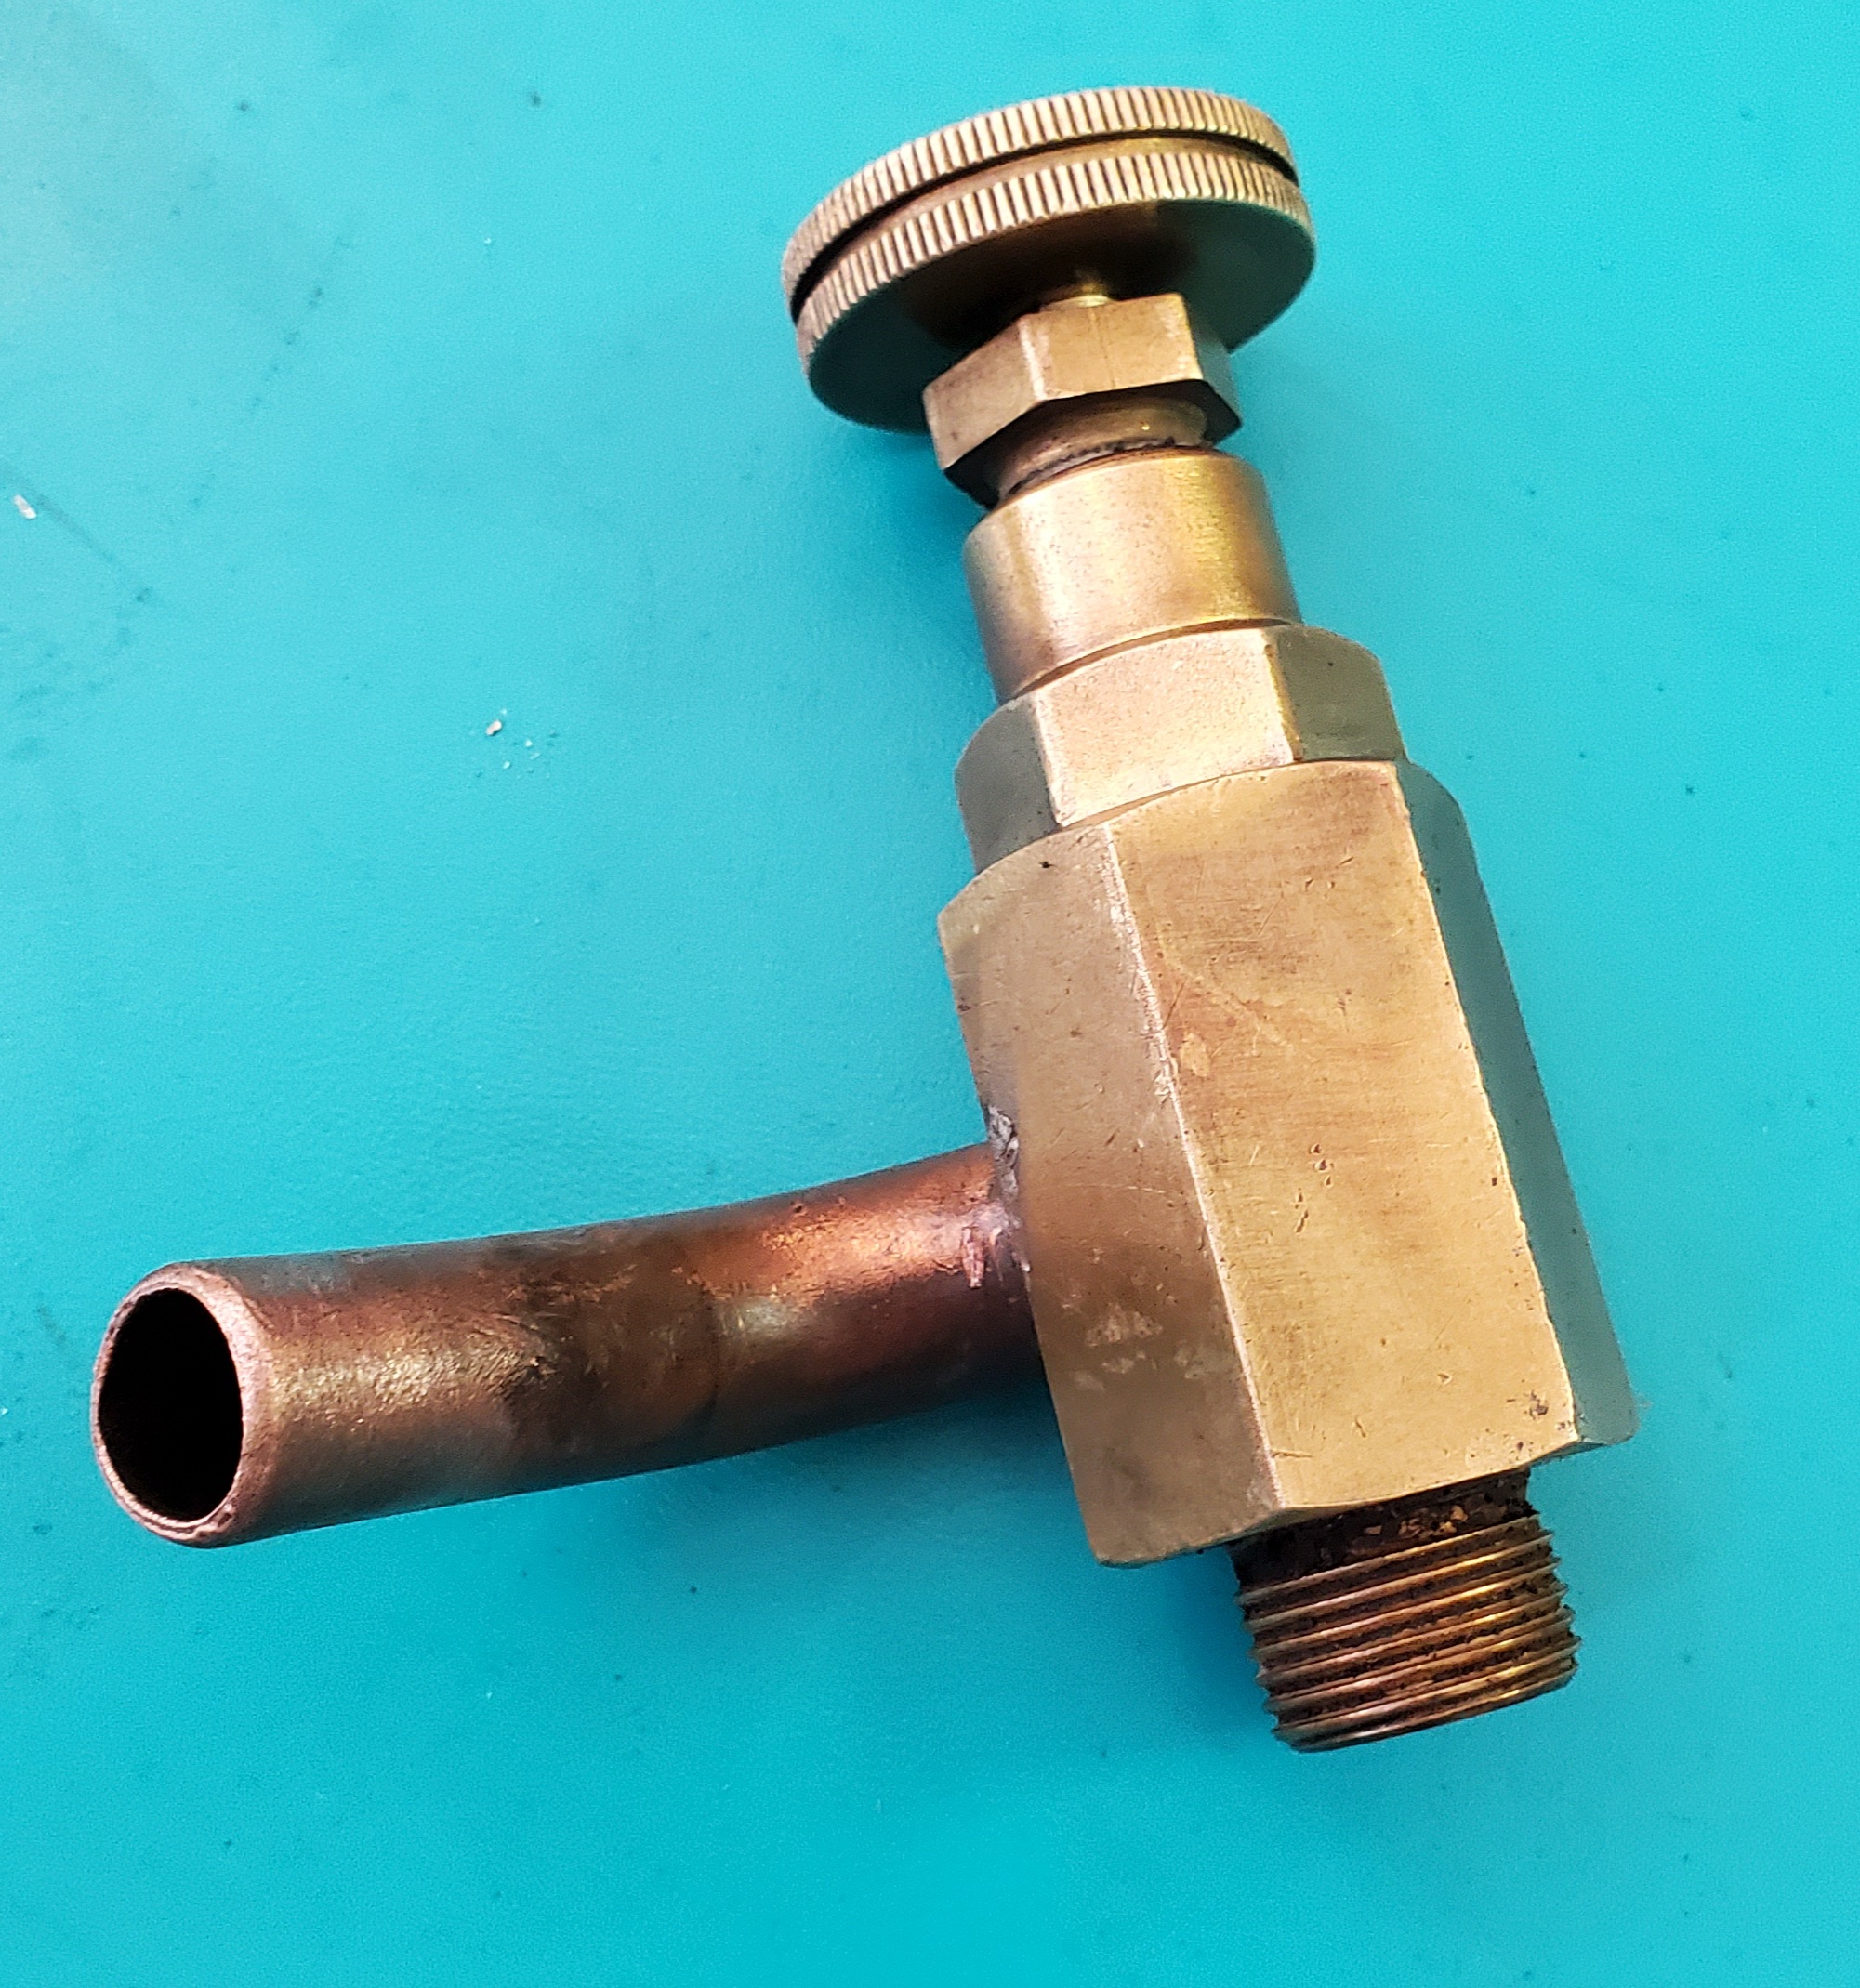
 and the valve is ready to reinstall.
 A sharp eye would notice that the top of the stem is now steel rather than the original brass but, as this valve is painted engine colour on a concours car this cannot be seen.
I’m confident that this repair is at least as strong as the original brass stem but caution all 100 owners to be gentle when operating this valve as it only needs to be turned until one can feel resistance CRANKING IT HARD DOWN WILL NOT SERVE ANY USEFUL PURPOSE AND CAN EASILY BREAK THE STEM.
Would like to talk to you about heater control valve
Certainly Bruce, any time. My email is michaelsalter@gmail.com.
Hi Michael, I finally got around to installing the valve that you repaired for me, I am so happy to have the original back in the car and serviceable again. Just in time to turn the heater off for the summer. Thanks much. Simon