
 The early BN1 that I finished restoring 7 years ago achieved a concours gold at Gettysburg but now that I have a few thousand miles on it I have been very disappointed to notice that the new zinc plated brake lines that I fitted have started to show signs of rust. My guess is that the plating was extremely thin and just the few times that I have driven it in the rain have been enough to cause them to start deteriorating. I’m probably going to have to change them before too long.
I’m currently restoring a very low mileage and almost rust free BN2 and for the most part the 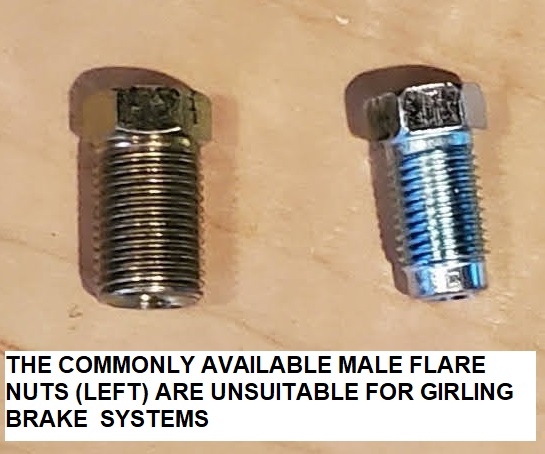 original brake lines that I have removed from that car are in pretty good condition with only some small areas of surface rust despite having been on the car for over 67 years. They sure don’t make ‘em like they used to.
I have decided to fit stainless steel lines to this BN2 and, although some vendors do sell quite expensive sets of stainless lines, to my surprise, it turns out the end fittings (flare nuts) that they supply are not stainless steel which to me rather defeats the purpose. I did consider the copper-nickel brake line set option but I have had some unfortunate experiences with that material and decided to give it a miss.
After purchasing the 3/16” stainless line I started the hunt for the appropriate male and female stainless steel flare nuts but, despite my very best efforts, I was unable to 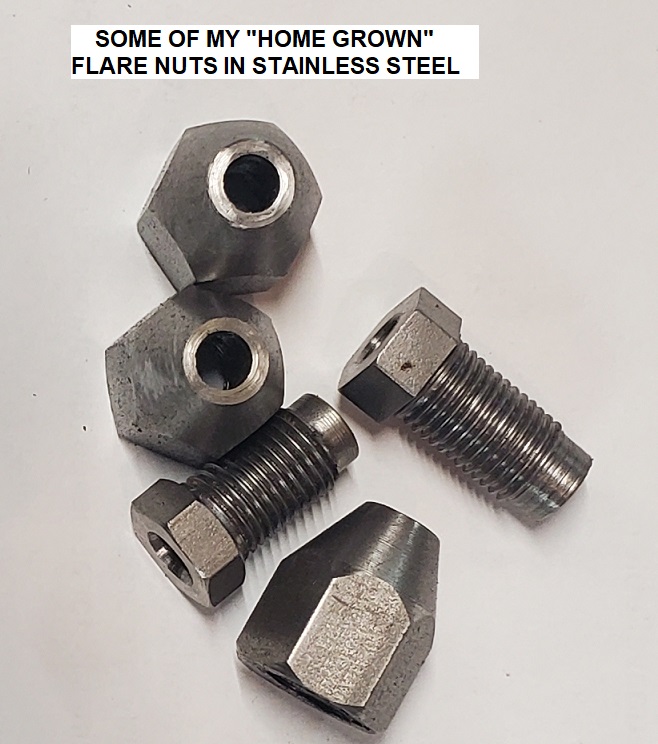 purchase them anywhere.
 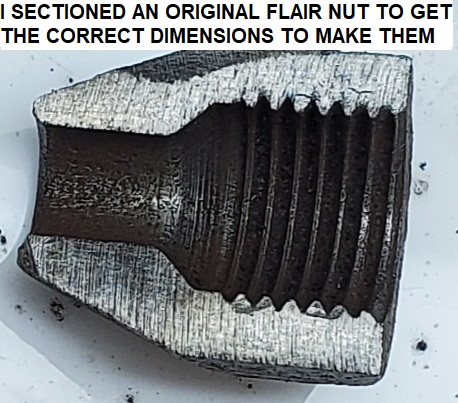 There were a few places that sold a male thread type in stainless but they were not suitable for the Girling fittings on a Healey.
With all my purchase options exhausted I decided that if I couldn’t buy them, I would make them and purchased some lengths of 7/16” and 9/16” hexagonal stainless steel bar for the job with the idea that I would supply the material to my local machine shop to have them make them on a CNC lathe. Second surprise! The quote was well over $10 per nut! 
This was going to become very expensive very quickly so, having lots of time on my hands, I decided to make the flare nuts myself on my lathe after all, how long could it take. Well, half a day to make the 12 male thread ones and another hour to make the 3 female ones. Good thing I’m not paying myself by the hour. I was lucky enough to have some small pieces of ¾” and ½” hex brass to make the ones for the ¼” line from the reservoir to the master cylinder. I’ll get them zinc plated to hide the brass.
I was delighted to discover how easy it was to bend the stainless line to shape however, converting brake tubing from a roll into in individual lines of the correct length is not quite as easy as it looks.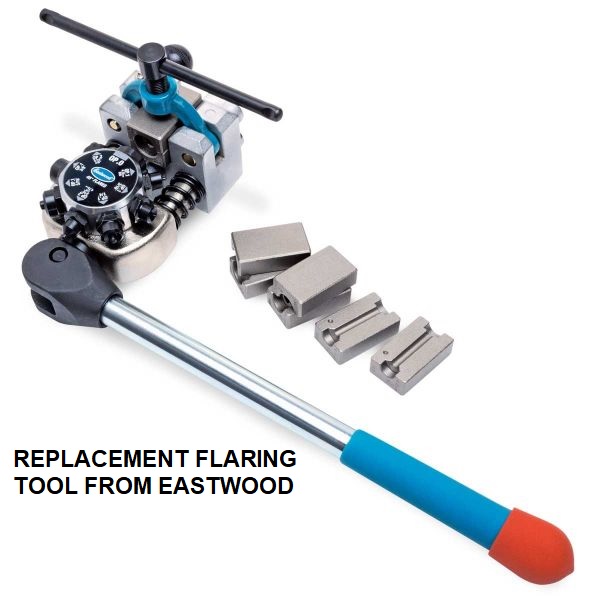
When I didn’t have the removed line to use to determine the correct length, I used a length of ¼” clear vinyl tube to trace along the required route then add an inch or two for safety. Fortunately, I have lots of photographs of original cars which I use to ensure that I’m running the lines where they are supposed to go as there are many bends in most of them.
The next task was that of flaring the lines. For many more years than I care to remember I have used a Sykes-Pickavant flaring tool however, it was just not up to the job on the stainless and I broke two of the irreplaceable forming dies on my first attempts. Time for another investment and I purchased a new and more modern design of flaring tool which handled the stainless steel without problems.
I hope this exercise has been worth all the pain.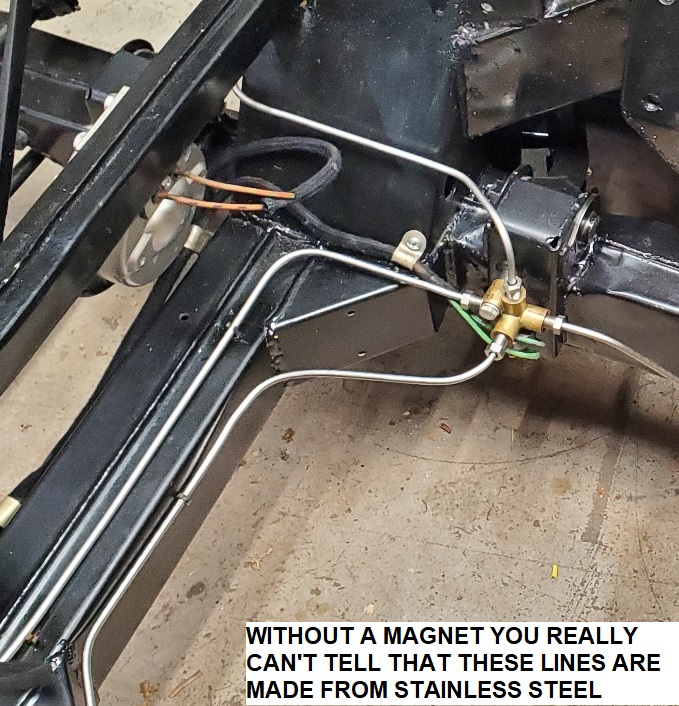
Great write up and superb work. Well done.
Nice job ,Mike .